Your shopping cart is empty!
MENU
Your shopping cart is empty!
 If you’ve spent some time working in the lab, there is a great chance that you have already used an air displacement pipette. Yes, it may look quite unassuming, but it is unquestionably one of the most indispensable pieces of equipment in every biology, biochemistry and chemistry laboratory. So, what exactly is an air displacement pipette and how does it work? Let’s take a closer look.
Air Displacement Pipettes: Getting Down to the Basics
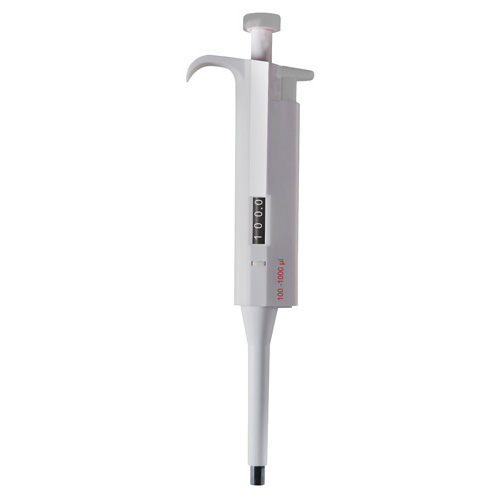
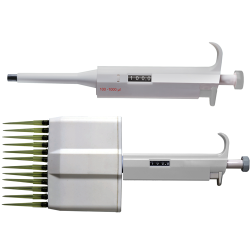
An air displacement pipette is a common laboratory tool used to handle a measured volume of liquid between 1 µl to 1000 µl (1 ml). Due to its high accuracy, this laboratory tool is commonly used in standard pipetting applications. However, since most organic solvents can cause considerable damage to air displacement pipettes, their use should be limited to aqueous and non-viscous samples. For biological samples (DNA, RNA, proteins), the use of air displacement pipettes with filter tips is highly recommended.
An air displacement pipette has six main components (plunger button, tip ejector button, volume adjustment dial, digital volume indicator, shaft and the attachment point for the disposable tip) and is available in different models. It is important to note that the piston is a permanent part of the pipette.
How Do Air Displacement Pipettes Work?
In a nutshell, piston driven air displacement makes these pipettes work. The piston inside the air tight sleeve descends and forces out a volume of air when the plunger button is depressed. Upon releasing the plunger button, a partial vacuum is created in the space vacated by the piston. This vacuum pulls the desired volume of liquid into the tip and makes it available for dispensing. Please note that there is always an air cushion or dead volume of air between the pipette piston and the liquid sample.
Here is a step-by-step guide to getting accurate results from your air displacement pipette when using the forward mode.
For the reverse mode, you need to depress the plunger to the second stop position during the preparation step and follow the same steps as above.
Leave a Comment